Thursday, September 19, 2013

A Study in Pink

So when I design a piece, I usually have a complete image in my head that I set to work on and maybe tweak a bit depending on the supplies I have on hand or at my whim. This, on the other hand, was a build as you go project.  I had just finished a red and gold necklace and wondered what the next would be. I went feeling through my beads and I found these gorgeous faceted pink beads that are some of my favorites but seldom used. I took a few out of their container and placed them on my workspace.


They landed pretty much in this sort of clover shaped position and that was enough inspiration to make what I consider to be a very lovely necklace.

It grew bit by bit as I gathered many of my pink beads to figure out which ones would work. I didn't want them to be too match-y. At one point, I was tearing through all of my supplies looking for a particular bead. It took forever to find, and when I finally did find them, they were so wrong for the necklace that it was kind of funny (kind of, as in not at all). I found the perfect substitute a lot easier and the layout of the necklace was complete.

Then I had a few stringing issues. I wasn't too upset that the way I wanted to do it didn't work out because it was highly experimental for me. It was a stringing technique that I dreamed up for this necklace that didn't work out because of my issues with knots. I've pretty much perfected the type of knot I use most often, but this would've needed an entirely different sort of knot. So, I decided to go with something that I knew would be successful, I added the chain (it wasn't always going to be chain but I figured it would keep it dainty if I used chain), then the clasp and...

 Voila!

Here it is in all its shiny, pink glory!


Here it is with a couple of different backgrounds:


This is one of many lovely necklaces I will have for sale this Saturday at the Vineland Flea Market. It's my first time trying this one, it's new. I hope I have great time there because it's weekly and it would be great to have a weekly gig instead of once a month like at Silver Lake.

Wednesday, September 18, 2013

I've Got Spirals on My Fingers! *

So I recently came across this video and I thought I’d give it a try.

 I was a bit hesitant due to my challenges with using the double needle technique (not technically using needles but both ends of mono-filament). But I thought the ring had potential so I made it.

It's really late and if I bothered to really edit the photos, this post might not get done, so I'm going to be showing pictures of it as they came off of my phone. Still, this one isn't for sale anyway, but when I do make some for sale, the pictures are going to look a LOT better.


I started this ring late at night a couple of nights ago, which is why the image is so dark. 
But I wanted to get a quick snapshot of what the base of the ring looked like.

And this is the finished ring. I really liked the combination of colors that I used. 
Rob says that it reminds him of a Venice Carnavale mask. 
Um, I don't see it, but okay! lol He did say he really liked it.

Here's the profile of the ring.
It seems a lot puffier here than it actually looks on my hand.

Here's the band, I really like the look of it.

Here's the finished ring again.


I'll probably end up keeping this ring. I had a few glitches happen while making it. I do plan on making a few more though, for sale in my booth. It depends on how fast I can make one. I'll probably try to crank out one more for now, but I really have to make some more necklaces for sale because I found a new market to vend at and I'm trying it out this weekend. Wish me luck!

*Fun fact: The title of this blog entry is a nod to the Beatles where at the end of Helter Skelter, Ringo Starr yells, "I've got blisters on my fingers!" from all the crazy drumming throughout the song.

Sunday, July 28, 2013

Look out honey, 'cause I'm using technology

So I was pretty busy last night, and by that, I mean this morning. I got to bed close to 3am. I was writing descriptions and listing things on Etsy. Before that, I set up my Etsy shop on Facebook. I don’t know if I sometimes have Type A personality spells or what but I feel so elated when I’ve had a productive day/night/early morning. Now I’m up way too early and listening to some Iggy and the Stooges so it’s all good.

I’ve made a goal to have at least 20 listings on Etsy by the end of August. After the progress of last night, I feel that this is perfectly doable and not a goal that is too far out of my reach.

Here is a link to what my FB Etsy page looks like. One of the backgrounds I had to choose from was Steampunk themed and I SOOOOO wanted it. It was gorgeous! But my jewelry (so far) isn’t Steampunk themed so it wouldn't be true to the biz. I did find one that just happened to have an 8-pointed star which is the symbol of my business. Not like my logo but still an 8-pointed star so I felt like that was an omen that I should choose that one.


I’m thinking about taking advantage of the overcast glow of the early morning to take some pictures even though I’m a bit hopped up on feelings of accomplishment and lack of sleep. I know that I’m going to crash in the near future, but I’m hoping coffee will delay that a bit.

Oh, and I just looked up Pantone's Fall colors yesterday. I know, it should've been much sooner. So here's the colors I'm looking forward to using:

Thursday, January 31, 2013

A Quick Update.


[This was originally going to be a blog entry on my personal blog, (on New Year's Day, I challenged myself to write a blog post every day for a year) but then I read through it and saw that the whole thing had to do with jewelry making and the business side of things as well. I also owned up to the fact that I had been neglecting this blog for far too long. So I yoinked it from the grips of my personal blog and decided to put it here, where it really belongs...]

Well, I am all out of my spiral bracelets. They have all been sold! [Insert happy dance break.] So now I have money from buying them and I get to make some more, which is fun for me. So this is a win/win situation. Another win, is I get to buy one of those 6 ft. folding tables that are much better than the one that I have. It’s really heavy and is such a bugger to move every time I need to, even though Rob does most of the moving. It also takes up more space than a folding table would. My next major purchase will be a new pop-up-style canopy for my booth. The one I have now is on the cheap side, and it’s the kind with the splayed out legs. I want a sturdier one with legs that stand vertically. They allow for more room because they’re 10’x10’ top to bottom, where as the one I have now is debatably 10’x10’ at the feet and about 8’x8’ at the top. Splayed out legs are also easier to trip over. The straight legs would be safer for me as well as anyone around my booth. The way things are going, I feel like I’ll be able to do that soon.

Right now I have to go into super-productive mode. I have the Silver Lake market on the 9th which means that I need to restock my booth. I should have been doing that since the end of the holiday season, but I needed a bit of a health break and I have been working on commissions. Getting back into doing the booths and all is something I am rather excited about. I am going to have a small part of my booth set up for seasonal products. For this month, it will be Valentine’s Day jewelry. Next month will be Spring themed with maybe a bit of the green stuff for St. Patrick’s Day. The market in April is on my birthday, so I might do birthday specials something like “guess my age for a 10% discount.” Hmm, maybe I won’t, because NO ONE would guess right unless they were very lucky. I have the family “curse” of looking WAY younger than I actually am. My mom says it bugs her to no end but I know deep down inside she likes it. 

So that's a brief update and I promise that new posts are coming really soon. Most will even have pictures!

Saturday, November 24, 2012

Pantone Color Forecast -- Spring 2013

So these are the colors that are forecast for Spring 2013:

Challenge Accepted.


Okay, so I thought it would be really bad-ass if I just ended this with "Challenge Accepted" and strut off without looking back like there's explosions going on behind me. But I have to say that I'm really excited about these colors! Look at them! They're so Preeeeeetttty! And I can see myself combining them in ways that I may not have thought of before. Another bonus is that I'm pretty sure that I have all those colors in my stash already. I also have nail lacquer (that's what they call it now) that is the color of Monaco Blue that I bought a month ago or so. I feel like such a trendsetter! But I digress...

In a nutshell: 
*I'm super-excited about the colors. 
*I'm planning to start early. 
*Buckle your seat belts and be prepared for the awesomeness to come. <--Too much? Maybe, but we'll see.

Thursday, November 1, 2012

November 1st "Eureka!" Moment

So this month I've decided to take part in the NaNoWriMo challenge. But I'll still be doing my beading of course. In fact, I have a boutique to sell at this Saturday in Signal Hill. It's at an Antique Mall so I'm sure to have better results than at Glendale a couple weeks ago. But none of that is the main point of this post...


Okay, so this may be a little hard to explain but I'm going to try anyway. Besides, I think it’s a great technique. So today I’m working on a bracelet and I need to add new thread. I already weaved in the end of the end of the thread I was already working with, and I was ready to add the new thread. Now, I would normally add the thread to my needle, go back a few rows, and weave and knot the new thread through to come out at the point where I would continue my rows -- dragging most of the length of the thread through the beads...

This time, what I did was go through the point where I would usually come out to continue beading, and I would only pull through a short portion of the thread and weave that back a few rows. When done, I put the needle at the other end of the thread and continue. This made adding new thread go quicker so I can get back to adding more beads as soon as possible . Quicker, except for this first time because as soon as I did it I felt the need to put a post about it on Facebook, but it turned into this blog post instead.  Anyway, I now have less chance of getting tangles just in the process of adding thread. Also, I don’t have to make any awkward twists and turns to make sure that the thread came out at the right spot.

I don’t know if a lot of people do it this way or not (have I just stumbled upon something that everyone does and I’m just out of the loop?), but I thought it would be a great idea to share and it’s something I’m going to continue doing from now on.  I hope people find this to be a very helpful tip! :-D

Today's gratuitous picture is of a cute, tiny snail that I saw on a leaf as I was leaving a friend's house on Halloween night: 
Smallest I've ever seen! About the size of my fingertip.

Tuesday, October 23, 2012

Necklace Display Templates in PDF

So here they are, the templates for the necklace displays that I posted a couple of posts ago. See the previous blog post to see how they are put together. You can attach them with velcro tape or double-sided tape. I hope these templates will give you a lovely yet functional display.

Here's the Low Profile Template

Here's the High Profile Template


Um, I guess that's it. I feel like there should be a picture here or something...

Oh, I know, here's an instagram pic of a teabag tag I had once:
I liked it because it mentioned beads :-D


Sunday, October 21, 2012

Glendale and Bust


So Sunday’s swap meet at Glendale College was a bust and I wish I hadn’t stressed out so much about it the night before.  I should’ve taken it as an omen when after I finished setting up, I began to feel so sick and dizzy that I almost passed out. It was quite scary, but after laying back in the van for a while, I felt much better.

There were good points to the swap meet though:  My mom got to visit me which is always fun. I also got a visit from a friend who I hadn’t seen in a long time. She was the one person who bought something. She didn’t have to but I’m glad that she really liked what she bought. Another good thing that happened was that I got to see my new display and booth set up in action. I really liked the way it turned out, despite the fact that I’ve forgotten the connectors for the grate cubes that I was going to set up. It still looked nice though. Unfortunately, I only got the one picture because I wasn’t feeling so hot. Lastly, today's set up taught me what I need to fix or ad to the booth to make it work right. For one, I need lots of little weights to keep things from blowing over. I also learned that if you see someone coming towards you wearing sheer tights for pants (hint, just because they're black does not mean they are not see-through), avert your eyes before you see something you don't want or need to see. 

The swap meet seemed more like individual yard sales all in one lot, a bunch of people getting rid of things they didn’t want. I thought it was going to be more “retail”. You know what I mean?  I spoke to this one vendor who had been going there for several months says that it’s always low sales for her and she regrets prepaying for the next 4 months. But I learned that at the end of the day. It was good though to talk to someone who has been there often enough as opposed to setting my opinion of the site just on my personal observations. I also overheard one lady say that she usually packs up and leaves by 11. The swap meet opens at 8 and closes at 3. If the crowd thins enough to want to leave by 11, then I should be finding a better use for my time.

There’s a few other markets that I want to check out, granted that I have the funds to get a booth at them.  Hopefully I’ll find one that I can attend regularly with beneficial results.

Saturday, October 13, 2012

The Long Awaited Necklace Display Entry

Between helping my mom with schoolwork and prepping for the Glendale Swap Meet next weekend, I haven’t had the chance to post this blog yet, but here it is.

So one day, I was looking through Google Images for something, and I came across a picture of a necklace display that I thought was rather interesting. That got me to searching for more necklace displays that I can make myself.  The displays I wound up making were a sort of amalgam of a few I saw plus a few ideas of my own. I fixed some things that I thought could have been designed better or made more practical.


First it started off with sketches of what I wanted to make.


Then, I used Word and the Insert Shape function to modify into the forms that my displays wound up taking.


I printed them out on cardstock and taped the templates together.


I found this poster board and foam board at the dollar tree.

I then traced the templates onto the poster board so I could cut them out and have templates that are one piece, and without tape.


This ankle weight made it easy to hold down the pattern for tracing onto the poster board. I used it for tracing the pattern onto the foam board as well.


After the pattern is traced onto the foam board, use an Exact-o or craft knife to cut it out. Don't use scissors. It will weaken the edges of your display form from all of the squeezing. Also, do it as neatly as possible but do not fret if it doesn't look perfect. When you cover it with shelf liner or whatever you will cover yours in, it will smooth it out enough to not be noticeable.


One tweak in design that I am especially proud of was my decision to use sticky Velcro tape to join the displays so that I can dismantle them to lie flat for transport. The instructions that I have come across used double-sided tape, but that meant that it would stay in it's standing position and be cumbersome to store and transport. This Velcro tape is VERY strong and I don't regret using it one bit!


Use a sharp edged ruler to help fold your display where needed

At Marshall's, I found this awesome shelf liner to cover my necklace displays. I'm planning on using it to cover several other things for my booth, including the earring displays I will be making this week. Included in this picture are some inexpensive cardstock pads I also found at Marshall's for a great price!

(I just realized that I didn't take any pictures of covering the displays in the shelf liner. I might do that in a part 2 if I get the chance to do that soon. I must say though that this shelf liner was VERY easy to work with and ease around corners and such.)


 And here's the finished products. It's hard to tell from this picture but the slope of the taller one is quite steeper than that of the smaller one. I feel the different heights will give my booth a lot of visual interest.

 Another thing I would show in a second entry is how the back of the display looks and how the part that props it up is attached to the back. Hopefully, I'll get to that second post this week but I wouldn't quite count on it because this week will be SUPER busy as I prepare for the swap meet. I also plan to make PDF documents of the templates so that others can use it, that is, if they don't feel like designing their own.

Friday, October 12, 2012

Blog quickie: April’s Homemade bead spinner


This is what the most common spinners look like

When I first heard about bead spinners, a contraption that helps you speedily string up long strands of seed beads, my first response was, “Wow, what an awesome idea!

When I looked them up, my second response was, “They cost HOW much?!?!” Yeah, I wasn’t having that...


Then one day I was stringing up a bunch of seed beads for a project, probably one of my beaded flowers, and the bead spinner popped into my mind. I had already gotten tons of Pringles caps from people because I asked for them to use as trays for beads that I was working with stuck something through the middle of it to use as a spinner handle.

Hey, it works for me! :-D
I’ve used many things as the handle but I have settled on using a large nail.  The cool thing about the nail is that not only is it removable, like most things I've used, but you can heat the tip of the nail to make it go through the plastic cap easier. 

Speaking of heat, if the hole in the cap gets too big or doesn't fit around the nail snugly, I just take the nail out, and pass the hole in the cap over a lighter flame. That warms the plastic enough to be more malleable so you can push the plastic down to make the hole smaller. Much of the time, just holding it over the flame is enough to make the plastic snug up the hole on it’s own.

The Pringles caps work for me now but if I ever need to do much more beads than I normally use, I’ll probably find a new container.  Maybe a yogurt cup, not the Yoplait type but the short wide Chobani type. One day, I’ll probably even try getting the long curved needle to see if that makes it work even easier.


Lastly, here’s a hilarious video of someone trying to use one of the pricier, electronic bead spinners:

I'm glad I didn't shell out the money for THAT gem lol

Thursday, August 30, 2012

Necklace Rescue Mission


A project I’ve worked on recently is a repair of a friend’s mother’s necklace.  I’m not going to say a whole lot about it, except that I’m very happy with how it came out. I can’t take too much credit for that of course because the necklace had great “bones” to work with. I just added a little extra color and shine as you will see in the after pictures.

In this before picture, we see that it had two stringing materials, a silver chain and a gold beading cord where the gold tinsel on it came loose and balled up between the beads.
BEFORE

I decided to use beading wire for strength. I added silver beads as spacers in the upper position and a very light turquoise seed bead as a pop of color in the lower position. I think it gives the necklace a little added something without taking too much attention away from the main beads.
AFTER


I also added chain to the end to make it the 18" length that was requested, but then I decided to make it a little longer, no more than an inch and a half. That way, she has an option to change the length if she’s ever wearing a something with a collar/neckline that conflicts with it. I really hope she loves it!
End with a Show-stopper. I think the red background really makes it pop!

Tuesday, August 21, 2012

A Colorful Experiment


So I’ve fallen back down the research hole. Which would be fine but in this particular hole, all kinds of sources have been throwing in conflicting advice. There is an elevator that will take me back to ground level, but it’s awfully slow and I’m still not sure that it will take me to the right place or not. There’s another elevator that I’m sure says that it goes up but really will go further down. 

Man, I love talking figuratively to get my point across. Makes things interesting doesn’t it?


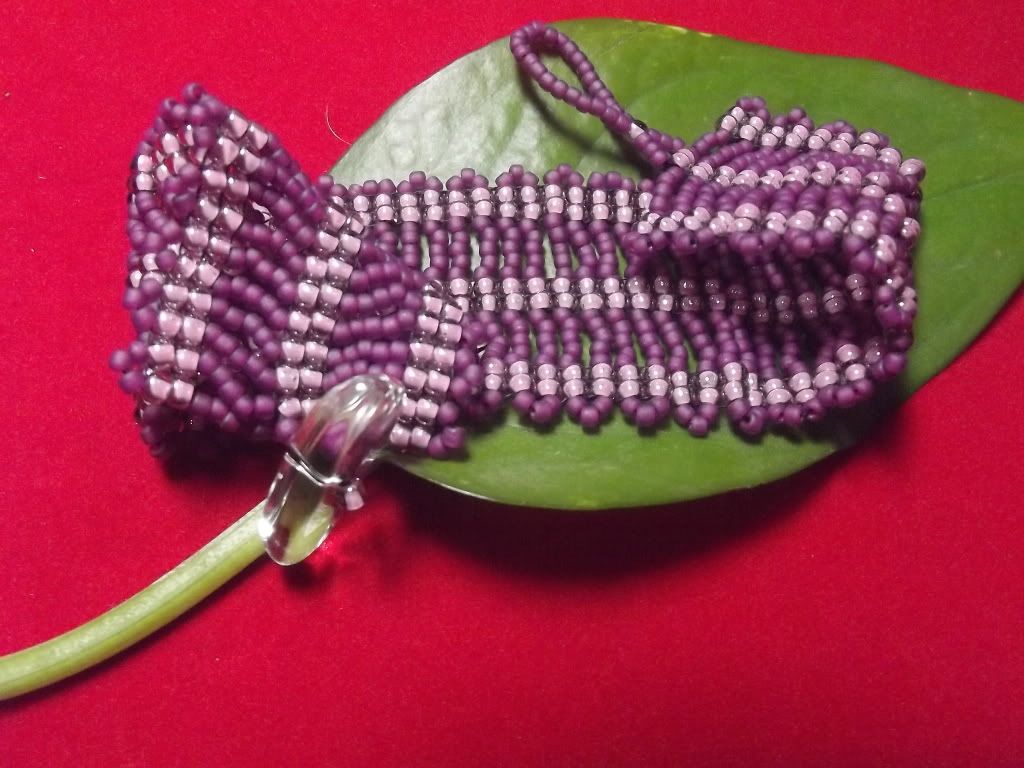
Anyway, I did have a brief vacation out of the hole when I spent a week working on these bracelets. This is the original here: Oscar Bracelet, which I had shown before, and while I usually like to make one or a couple of any particular design (see, my bridal designs), I took a good look at it and realized that I would LOVE to see how it would look in other color combinations. 

The original pattern for this, titled "Lattice Lace Bracelet", was designed by Carolyn S. DeGroff of CSD designs (look her up, she’s a great designer) but I tweaked it a bit to fit my aesthetic. 

Lucky for me, my husband is an artist who has a great sense of color combination and he’s also very honest. If I do something that’s not jiving with him, he will gently let me know that it’s not working. When he raves about something, I know it must be really good!

He raved about this one. It was the first one that I tried. I’m not usually a fan of gold, as I have probably mentioned before, but this combination just spoke to me. Besides, it’s a pale gold.


This one was next. He liked it but didn’t really RAVE. Still, I know it’s not bad. Also, for some reason I have come across many who go balls-on-fire crazy for all things purple. I’m not worried about having any takers on this one.


This one he REALLY liked because of how the clear grey beads pick up on the colors of the skin or any other surface that it’s on.  I really liked the blue and grey together. 


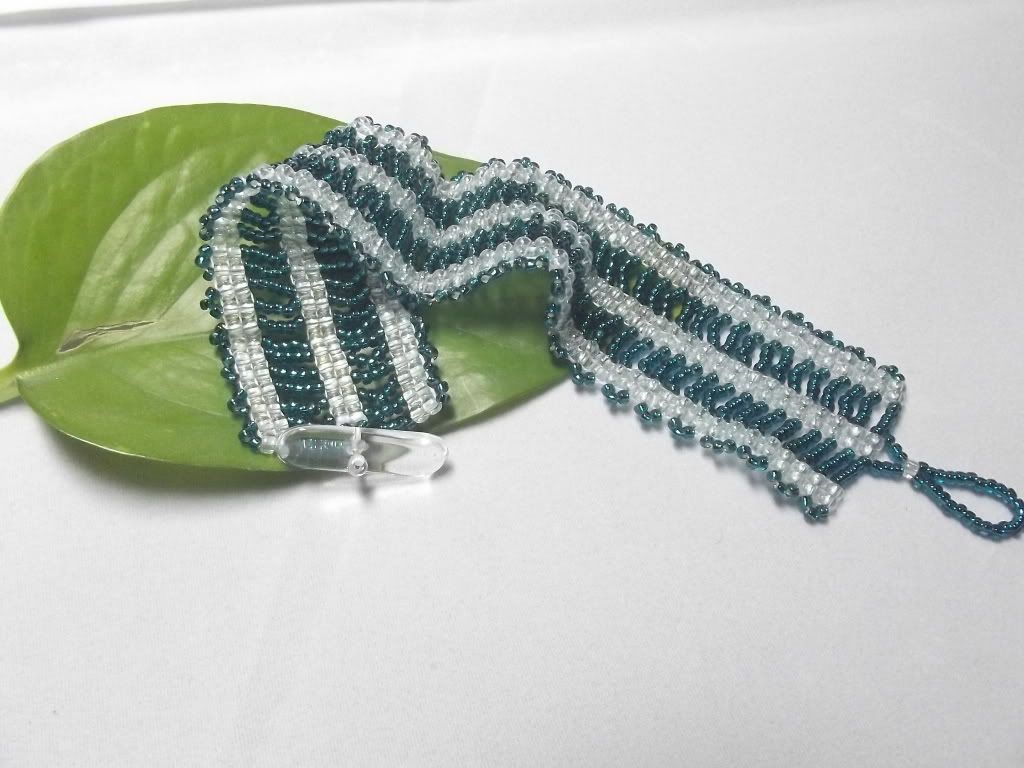
This last one is using a color that I find myself using quite a lot; teal. This is funny to me because I used to HATE teal and turquois until I had seen it used in really beautiful ways, like being paired with brown and white. This bracelet almost turned out completely different, but for some reason, that bracelet didn’t want to be made. I swear it, I had to take it apart several times because the thread wouldn’t cooperate and as soon as I switched the beads to the ones I used, I no longer had any thread problem. Figure that, huh? After I finished, I was glad that I listened to the thread.

I had such a hard time picking the pictures to use for this blog. Here's a link to a photo album with more pictures

All of the bracelets have a quartz bead, clear or smoky, as a toggle clasp. I like that because then I don’t have to worry about gold or silver prices. I also think that it adds something special. Funny thing about that… I bought the two strands because when they were strung up I thought they were so pretty, but whenever I used them in a design, I didn’t quite like the look. Until one day, I was trying to figure out what bead to use as a toggle for something else and BAM it hit me. Now they are my favorite go-to beads to finish off a bracelet.  I’m going to be sad when I run out, especially if I have a hard time finding more. But I’m sure I’ll be able to find a great substitute. I’m lucky that way. I might even have some great substitutes now, but I’m not using them because it hasn’t occurred to me yet.  Yes, beads are wonderful and they speak to me in a beautiful language.

Lastly, I feel sometimes that I work with blue far too often and would like to jump into some more reds and greens maybe even orange. I feel sometimes that most people don’t quite like orange as much as I do.   If I’m going to work with more reds and greens, it means I must go shopping, which I’m ITCHING to do, but sometimes I feel bad about buying more things without having specific plans for something. I could very well get out of hand. But that’s the fun part isn’t it?

Monday, August 6, 2012

Getting Down to Business


 First off, I'd like to apologize for taking so long to get back into blogging. My laptop took a crap and died on me and so now I'm stuck with trying to do things on my netbook. The netbook is rather impractical for all of the things that I want to do. Still, I'm soldiering on, mainly because I have good news as well. I am pleased to announce that I am no longer having bank issues, I've got my account set up and attached to Etsy, PayPal, etc. That also means that I've finally decided to stop the research spiral and went to get my sellers permit, I filed and published my DBA and I am now an official business. YAY!

I'm hoping to start adding things to my Etsy shop this very week. I would've begun a lot sooner but the one thing I'm trying to figure out is how to add tax to my listings. Who do I tax and at what rate? I understand that California is a whole mishmash of different tax rates for different counties and cities and from what I gather, in some cases it goes from neighborhood to neighborhood. So far, all the reading I have done hasn't clarified it for me. Makes me wish I lived in one of those places with no sales tax, or at least a straight tax throughout the state, if that even exists. Do I use the tax-rate for the area I'm sending things to or the rate for the area that I am shipping from. They really need to make these things simpler to understand, unless I'm just missing something. That could be the case. It's 106 degrees today (maybe more), my brain works optimally at around 30 degrees cooler and I am really fighting the urge to just nap all day. It wouldn't be a good sleep anyway so I'm not going to bother.

So this sales tax issue has me back in research mode. I don't want to under- or over-tax anyone and I want to be sure that any filing I do is correct. But I've decided that I'll balance it out with actual work. I've been trying to transform the small space I have at my disposal into an office that works for me. So far it's looking pretty good and I know once I have everything in place, running the business should be peachy... I hope.

Monday, April 23, 2012

Earring Photobucket test

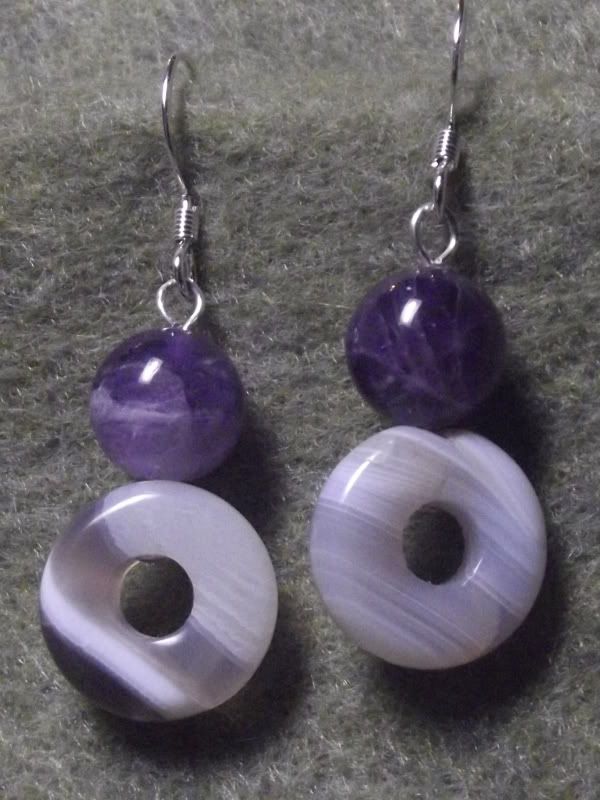
So I recently took a bunch of pictures of earrings for a friend to see and I figured uploading them to an old Photobucket account would be easier than posting them individually.  So now I'm checking to see how well I can post them from Photobucket to my blog. I will just post a few of them here and then link to the album. Enjoy.
Hey, that was easy! I'll try another below.
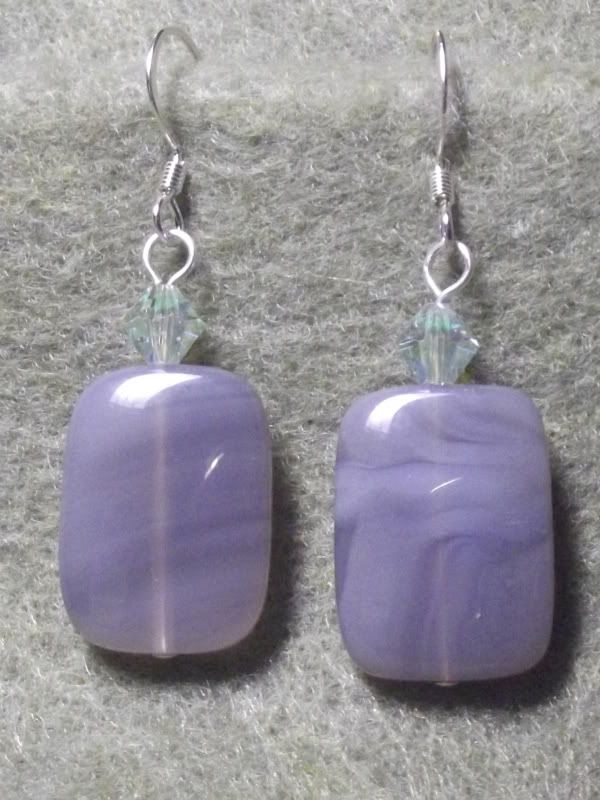
So this is probably how I'll do it from now on
As long as this works in other places that I link my blog to, this will be the method I use from now on. Here's a link to the rest of the collection: Earrings Sp2012

I see this making blog entries a bit easier... at least where pictures are concerned.

Friday, April 6, 2012

Winter's Last Snow

So this entry was supposed to be written a couple weeks ago but life got kinda hectic. It’s about a theme I was working on. Back in the last half of March, I had plans for the weekend that fell through. In deciding on alternate plans, I realized that it was only a few days before spring.  Then, the phrase “Winter’s last snow” came to mind and a series of jewelry around that phrase.  I went about gathering all of my white/clear beads as well as a few other colors that seemed “icy” to me.  The jewelry here is what I came up with.

Now you may be wondering, why would I do seasonal stuff at the end of the season. Well, actually, figured that I’d be early for bridal season.  All this white would look lovely on a bride.

I call this one "Ice Queen" Bracelet because it just looks royal, doesn't it?
This one is my favorite, well, until I add the next picture probably.
 I think these next two pieces are just plain elegant.
 This was originally going to be a necklace but I thought they would make nice earrings as well
 And here's the bracelet to go with the earrings.


This set, I made quite a while ago meant to be a bridal set, but I needed to work on it a bit more. I figured it would fit right in with this theme.  I call this the Snow Flower set.
 Not very happy with the quality of this picture but I forgot to take another picture of them all together again when I changed the background. Individual photos  follow.


Lastly, this is another of my favorites. Normally, I don't really like gold in jewelry but I love it when paired with white for some reason. Well, here's a good example of the reason below :-D
I call this Golden Lights because it looks like it's "on"!

As it happens in nature, winter likes to seep into spring a bit and so did these projects.  But now I’m going to put my snowy beads away and go back to working on my previous challenge of using old patterns that I’ve collected over time.  I know you’re excited about it… almost as much as I am!

Sunday, March 4, 2012

The Russian Spiral Blues


This is a Russian Spiral bracelet that was the February bead-along project on the Seadbeadersters yahoo group. I was a very late start because for a while I was VERY behind on emails. I also hadn’t done it because I was in the middle of my own little challenge that I didn't want to stray from. I felt it was sort of a cheat this week because this wasn’t a pattern that I had sitting around for a long time just waiting for me to make it. After I saw all the lovely bracelets everyone was coming up with, I decided that I was going to do it (and perhaps the March bead-along as well). 


So I have been trying to do this pattern all week and it’s pretty much been kicking my ass. First of all, I didn’t have the Hex beads listed in the instructions but I saw that some others in the group didn’t have them either and improvised so I decided that I would improvise as well. Boy did I improvise, many times and in many ways. There was always something going wrong or something not looking right. I’ve started, taken apart and restarted and taken apart and changed colors quite a few times. A couple people used bugle beads in their bracelets. I tried that, a couple times. I should've taken a picture of my attempts and titled them "Epic Fail". It's not that I couldn't work up the pattern, I was just having serious bead problems and it wasn't looking "right" or at least not pleasing to me.

This incarnation of the project was started Saturday night and finished Sunday afternoon. I decided in the end that using size 6 beads worked best of the stuff that I had to work with, and in addition to those, these round blue beads that I’ve had forever and never used (I supposed that sorta follows my challenge, huh?). I also REALLY wanted to use the orange beads that I’ve used in this one. They are some of my favorite and it’s a part of my scheme to get the world to fall in love with orange. 

I don’t know why this particular project was such a struggle for me, but I can tell you one thing that bothered me about it. It seemed pretty impossible to keep any kind of tension in the thread as I worked on it. As it is, it seems a little floppy to me but it holds its shape. I have no idea if it’s supposed to be like that or not. 

 
I will say that my husband and MIL were wowed by the way it turned out and I really do appreciate their appreciation of it because I was pretty much mad at the whole project and just wanted it to be over with. Maybe I’ll try it again one day after buying the hex beads that were supposed to be used.I think I'm also going to add a clasp next time, that might help me establish and keep proper tension. We'll see. maybe one day I'll even get the bugle version right.

I seem to be doing pretty well taking pictures without my light studio set-up